How do I configure the Record and Replay Service?
There are two steps to configuring OpenSplice to use Record and Replay (RnR)
- Add the RnR service into OpenSplice
- Configure the RnR storage.
Adding the RnR Service into OpenSplice
The RnR service is a pluggable service you can add into OpenSplice by updating the configuration. You need to have a valid license for the RnR service before you can use it. To enable the RnR service you need to have the section:
<Domain>
</Service>
<Service enabled=”true” name=”rnr”>
<Command>rnr</Command>
</Service>
</Domain>
in the Domain section of the xml configuration file that you are using. The name attribute specifies the name of the RnR service in the configuration. The default name is rnr.
Adding the RnR Service with the osplconf tool
To add the configuration into the xml file it is advisable to use the OpenSplice configuration tool. Start the launcher tool and go to the tools button. In here click configuration and the the opslconf tool will start. You can also use the command “osplconf” on the command line. You need to configure your environment to use OpenSplice first.
When the configuration tool appears, in the menu choose File -> Open and open the xml file you are using. Right click on the domain and choose Add -> Service ->RnR Service and click ok.
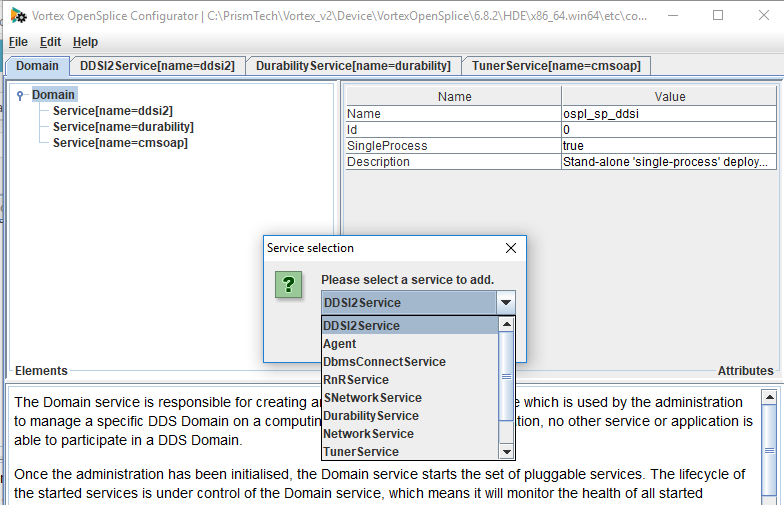
For the record and replay service to work it needs to have a name. Enter a name for the RnR service you are adding. The default name is rnr. After clicking ok it should appear in the list of services.
Configure the RnR Storage
The RnR service stores its data in a file to allow it to be replayed later. Before using RnR you need to configure the storage. Currently two types of data storage are supported:
- xml
- CDR
Versions before OpenSplice 6.4 only support xml storage.
Differences between the different types of storage
XML Storage
The advantage of xml storage is that the data is written in a human readable form. This allows you to edit the storage by hand. The disadvantage of xml storage is that it is less performant and the storage size is easily ten times larger than CDR.
On disk the xml storage consists of the following files:
- my-storage.dat – this contains the recorded samples. Each line is an XML record containing the sample user-data and internal data needed to replay the sample correctly.
- my-storage.dat.meta – contains the DDS type definitions of the recorded samples. When the samples are replayed the types are recreated by the service. These are also XML records.
- my-storage.dat.props – contains the properties of the storage eg the number of samples per topic.
Please note that you should not open the xml files using an xml editor as this may corrupt the file. If you wish to open the file you should use the Record and Replay Manager tool to open and edit it.
CDR storage
CDR storage is a binary storage format which is best suited to high thoughput and high volume data. Samples are serialised and deserialised using CDR. We recommend using CDR storage.
On disk the CDR storage consists of the following files:
- my-storage.dat – contains the stored samples in binary format
- my-storage.dat.grp – contains the internal administration data for the stored samples
- my-storage.data.meta – contains the DDS type definitions of the recorded samples
- my storage.data.props – contains the properties for the storage.
How to add a storage file
There are two ways to add a storage file for RnR.
- Add the configuration in the xml file
- Use the ConfigCommand in the API to add or modify the storage.
A storage has a status topic that you can subscribe to. If you create a reader for this and do not receive data you know that no storage file exists.
The storage is configured in the xml file in the OpenSplice/RnRService/Storage section.
<RnRService name=”rnr”>
<Storage name=”default”>
</Storage>
</RnRService>
This section allows you to define sample stores where samples are recorded and replayed from. Each storage is identified by a unique name. You can also define other attributes in this section depending on the storage plugin.
The xml file should be modified using the OpenSplice configuration tool. Start the launcher tool and go to the tools button. In here click on and configuration and the the opslconf tool will start. Alternatively you can use the command “osplconf” on the command line. Your environment will need to be configured for OpenSplice.
Go to File -> Open and open the xml file where the RnR service has been configured.
Click on the RnRService tab and you will now be able to add a storage.
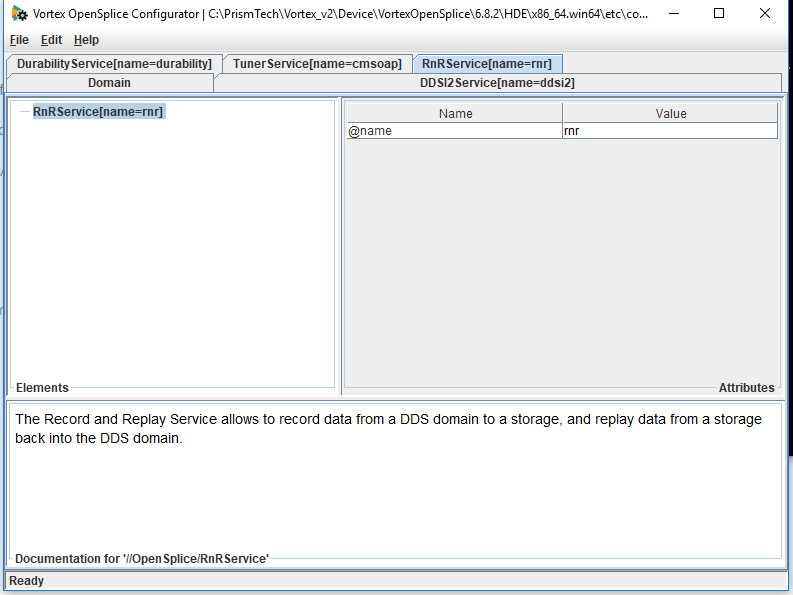
Adding xml storage in the xml file
To add xml storage into the xml file do the following:
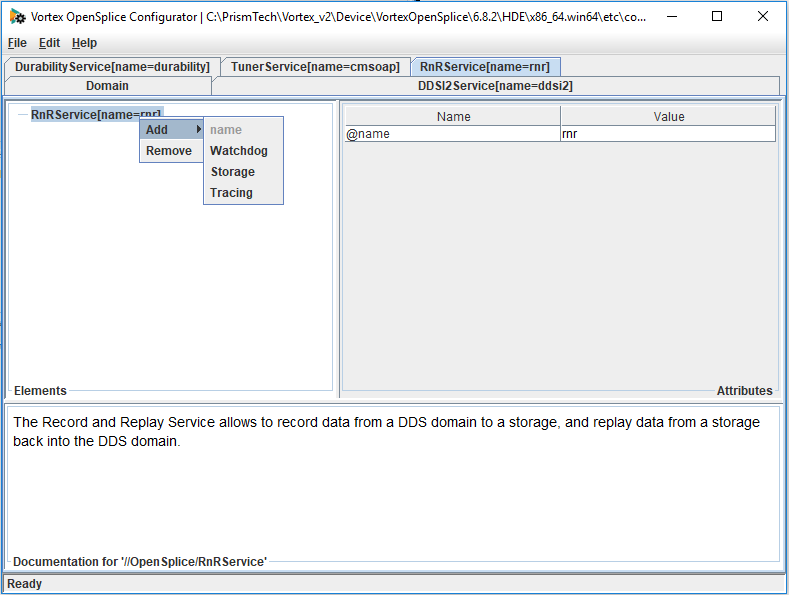
Right click on the RnRService and choose Add > Storage.
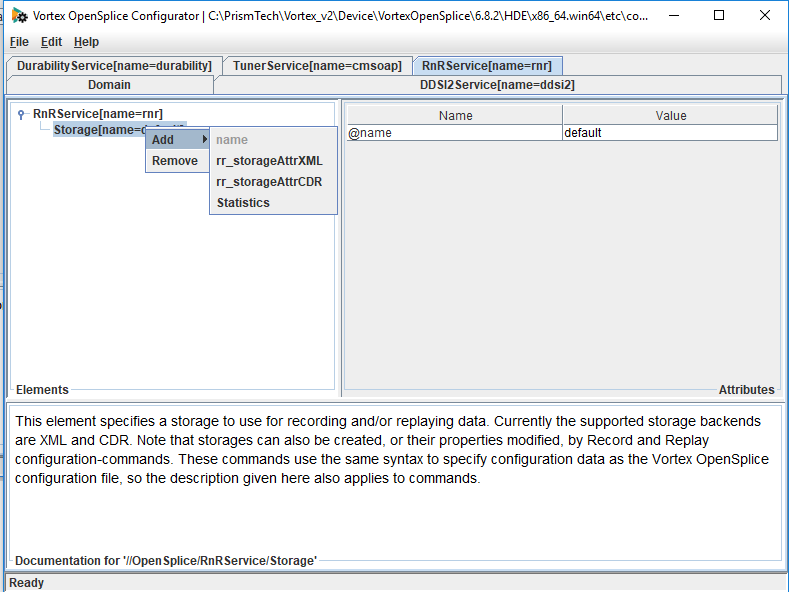
This adds a default storage. To add the xml storage right click on the default storage and choose Add -> rr_storageAttrXML
The XML storage should now appear in the configurator tool. By default the filename is rnr-storage.dat. If you want to change this you can click in the filename value box and add your own name. The filename may contain a relative or absolute path. If the path is omitted the files are created in the current working directory.
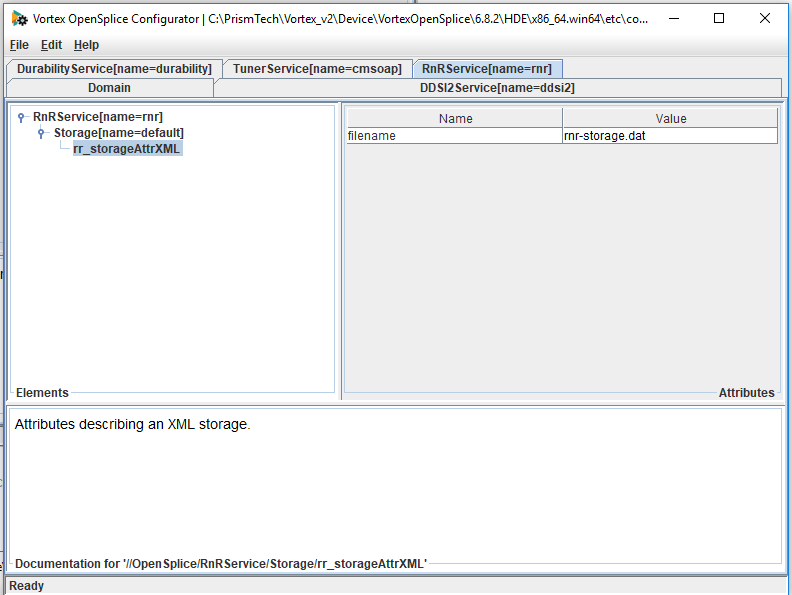
When you have finished with the configuration save your file.
The xml file should now have the following options added to it:
<RnRService name=”rnr”>
<Storage name=”default”>
<rr_storageAttrXML>
<filename>rnr-storage.dat</filename>
</rr_storageAttrXML>
</Storage>
</RnRService>
Adding CDR storage in the xml file
To add CDR storage right click on the RnRService and choose Add > Storage. This will add a default storage.
Right click on the default storage and choose Add -> rr_storageAttrCDR. This will add the CDR storage. By default the storage is named rnr-storge.dat. You can change this name by clicking in the value box and adding the name you want. The filename may contain a relative or absolute path. If the path is omitted the files are created in the current working directory.
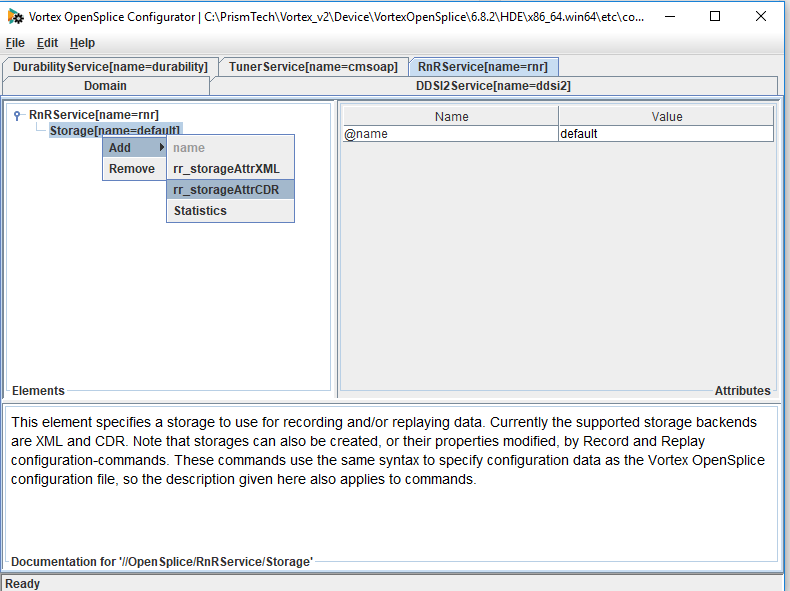
Save the file when you have finished. The xml file should have an element that looks like this
<RnRService name=”rnr”>
<Storage name=”default”>
<rr_storageAttrCDR>
<filename>rnr-storage.dat</filename>
</rr_storageAttrCDR>
</Storage>
</RnRService>
The details of the configuration options for the RnR service are explained in full in the OpenSplice Deployment manual.
Other configuration options for the storage
MaxFileSize
Both the xml storage and CDR storage have a MaxFileSize option. This sets the maximum size per storage file. During recording, if a file reaches the MaxFileSize, a new file is created. This will have a sequence number appended to the filename. The active file is switched transparently whilst replaying a storage made up of multiple data files.
By default this value is not set. The filesize is not monitored by the service and will be limited only by the filesystem and platform specific limits.
The value can be set in bytes. You can also set the value with K for kilobyte, M for Megabyte or G for Gigabyte at the end. For example 10M is ten Megabytes or 10485760 bytes
To set this value using the OpenSplice configuration tool right click on the storage file, either xml or CDR. Choose Add >MaxFileSize
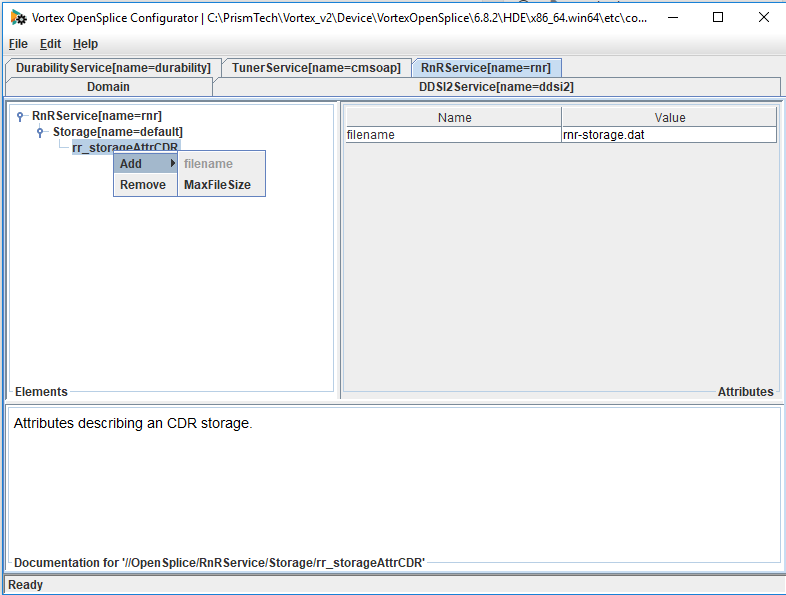
This will add the MaxFileSize into the storage. It will have a value of zero. To edit this click in the value box and add the value you want to configure.
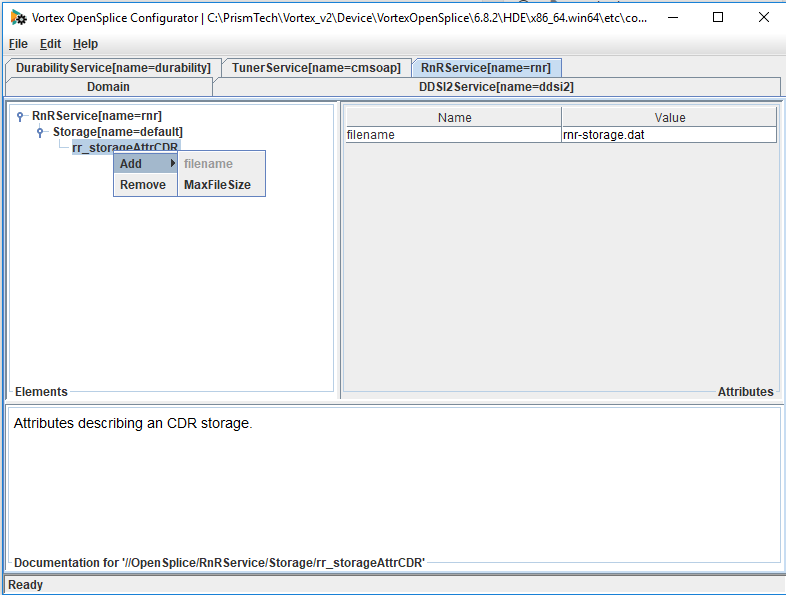
The xml will now look like this:
<RnRService name=”rnr”>
<Storage name=”default”>
<rr_storageAttrCDR>
<filename>rnr-storage.dat</filename>
<MaxFileSize>10M</MaxFileSize>
</rr_storageAttrCDR>
</Storage>
</RnRService>
Statistics
If statistics are enabled then the Record and Replay service will maintain runtime statistics regarding the data that is recorded to and replayed from a storage. These statistics can be published in the rr_storageStatistics topic. To enable statistics using the OpenSplice configuration editor right click on the storage and choose add -> Statistics.
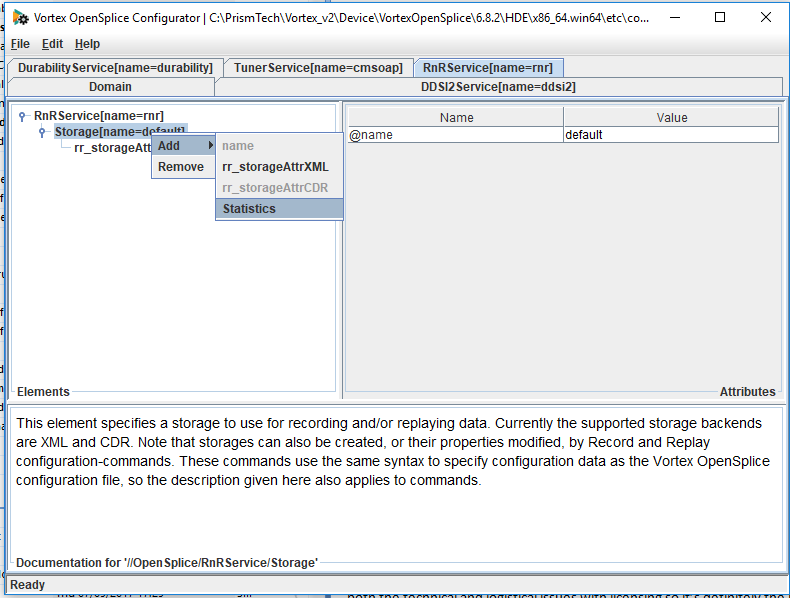
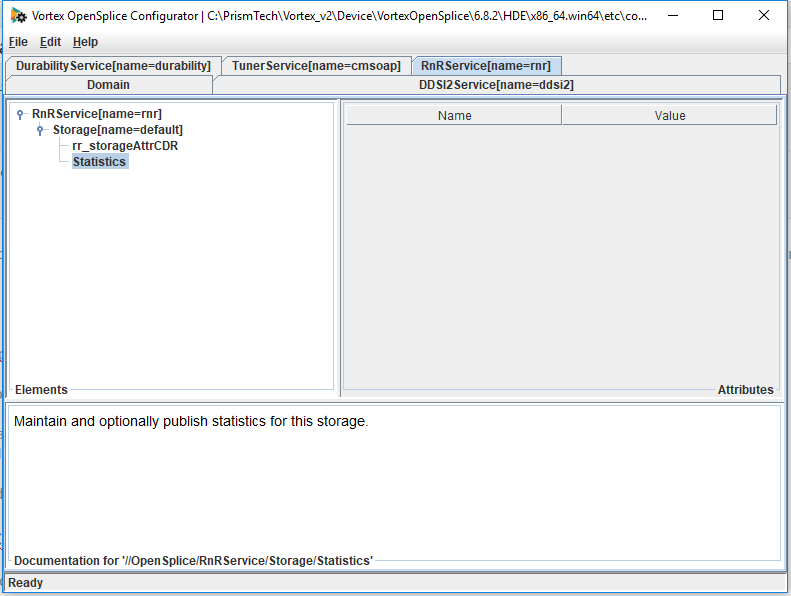
This will add Statistics into the RnR Storage. The xml file will now contain the folowing:
<RnRService name=”rnr”>
<Storage name=”default”>
<rr_storageAttrCDR>
<filename>rnr-storage.dat</filename>
<MaxFileSize>10M</MaxFileSize>
</rr_storageAttrCDR>
</Storage>
</RnRService>
Once statistics have been enabled there are a number of different configuration options you can set . To add these options right click on Statistics in the left hand panel. The options are
- enabled – this specifies if statistics are maintained for this storage or not. By default this is set to true.
- publish_interval – this specifies how often statistics are published in the storage-statistics topic. The value is set in seconds. If it is set to 0 statistics will not be published. If it is set to -1 statistics are published when the storage is shut down.
- reset – this allows you to reset the current values of the statistics in the storage. This only works for an existing storage as new storages always start with empty statistics.
Other Record and Replay Configuration Options
Every OpenSplice service needs to let the OpenSplice deamon know that it is alive by announcing its liveliness periodically. If the service becomes unresponsive the OpenSplice daemon can take corrective measures. This monitoring is done by the watchdog thread.
Watchdog
The watchdog thread is enabled by default. If you want to control the characteristics of the watchdog thread you can add it into the xml file. You are able to control
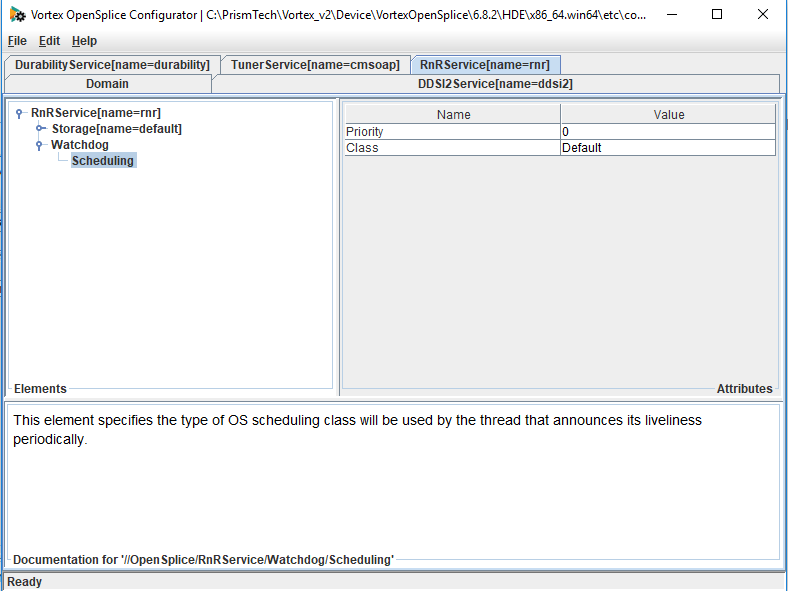
- Scheduling – this specifies the type of OS scheduling class will be used by the thread that announces its liveliness periodically.
- Priority – this specifies the thread priority used by the watchdog thread. Only priorities that are supported by the underlying operating system can be assigned. You may need
special privileges from the underlying operating system to be able to assign some of the privileged priorities.
When the watchdog thread has been added to the xml file it will look like this:
<RnRService name=”rnr”>
<Storage name=”default”>
<rr_storageAttrCDR>
<filename>rnr-storage.dat</filename>
<MaxFileSize>10M</MaxFileSize>
</rr_storageAttrCDR>
</Storage>
<Watchdog>
<Scheduling>
<Priority>0</Priority>
<Class>Default</Class>
</Scheduling>
</Watchdog>
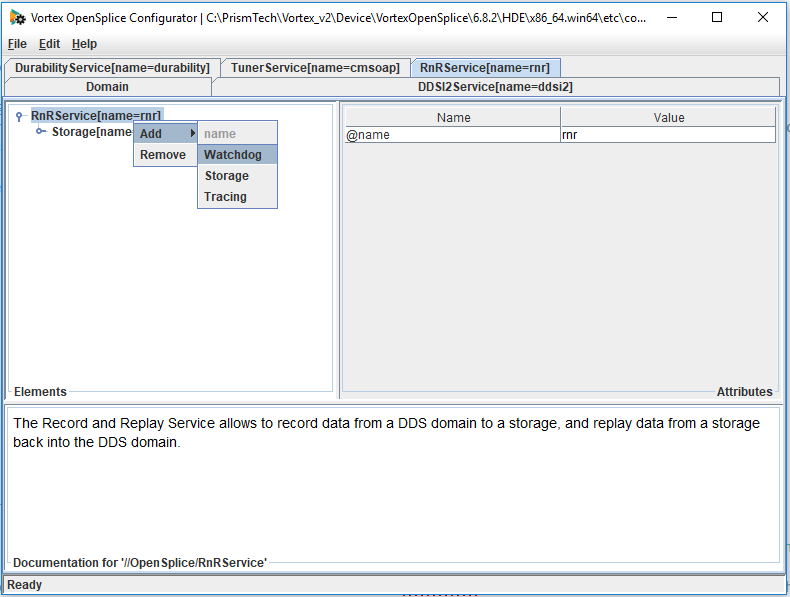
To add the watchdog thread using the opensplice configuration tool go to the RnRService tag. Right click on the RnRService name and choose add Watchdog. Don’t forget to save the xml file.
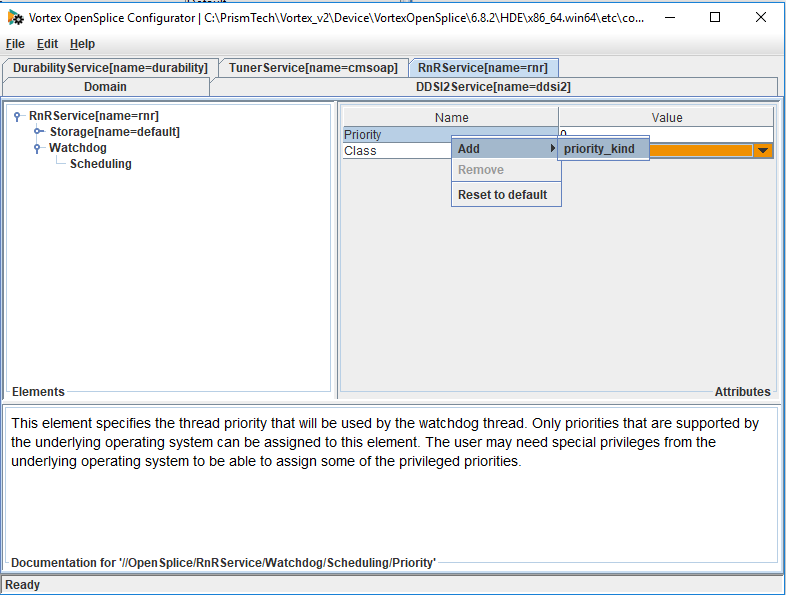
To change the scheduling and priority of the watchdog thread click on the little button beside the watchdog thread. This will open up the scheduling option. If you click on this you will see the Priority and Class on the right hand pane. To change these values just click in the box beside them.
Priority_kind
Priority also has a subconfiguration option of priority_kind which specifies if the priority is a relative or absolute priority. To add this right click on Priority and choose Add > priority_kind. This will be added into the right hand pane and you can click on the value box to change it.
Tracing
Occasionally you may run into problems when using the RnR service. In these cases it is helpful to enable debug logging which will show you what is going on inside the RnR Service. To do this you need to enable the Tracing element in the xml file.
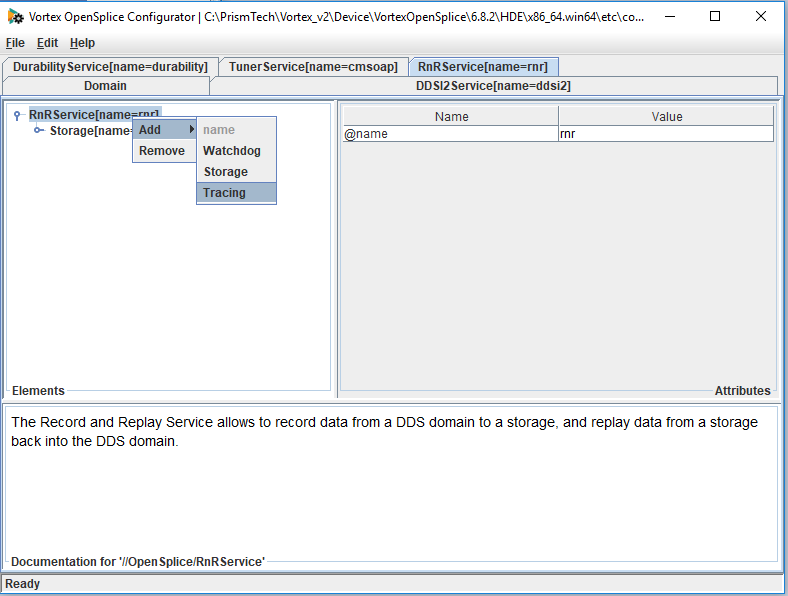
Using the OpenSplice configuration tool go to the RnRService tab. Right click on the RnRService name in the left hand pane and choose Add -> Tracing. This will enable RnR logging.
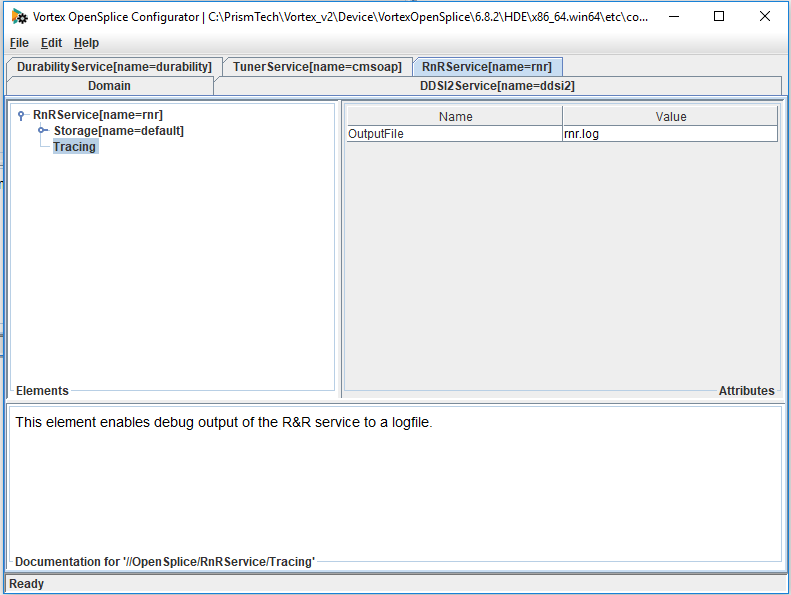
The tracing element will be visible in the left hand pane and the logging will be put into the file specified by the OutputFile option. The default value is rnr.log. You can change this name by typing in the value box. The value “stdout” can be used to send the output to “standard out” and “stderr” will send the output to “standard error”.
The xml file will now look like this:
<RnRService name=”rnr”>
<Storage name=”default”>
<rr_storageAttrCDR>
<filename>rnr-storage.dat</filename>
<MaxFileSize>10M</MaxFileSize>
</rr_storageAttrCDR>
</Storage>
<Tracing>
<OutputFile>rnr.log</OutputFile>
</Tracing>
</RnRService>
Other Tracing Configuration Options
The other options you can add for tracing are:
- AppendToFile – This option specifies whether the output is appended to an existing log file. The default is to overwrite the log file if it exists.
- Verbosity – This option controls the verbosity of the log file. The default value is INFO. Valid values are SEVERE, WARNING, INFO, CONFIG, FINE, FINER, FINEST, NONE
- EnableCategory – this option enables you to enable specific logging categories independently of the categories selected by specifiying a verbosity level. Multiple categories, seperated by a comma, can be supplied. The following categories are available:
• FATAL: Errors that are potentially fatal for the correct operation of the service.
• ERROR: Non-fatal errors.
• WARNING: Warnings that indicate for example incorrect or unsupported usage of the service.
• INFO: Descriptive messages, logged when certain important events occur.
• CONFIG: Events related to the service configuration.
• TRACE: Detailed messages describing the behaviour of the service.
• RECORD: Messages for each recorded sample.
• REPLAY: Messages for each replayed sample.
• Full path: //OpenSplice/RnRService/Tracing/EnableCategory
To use the RnR Service you can use the RnR API to record and replay data. More information on this can be found in the RnR API Guide which is part of the OpenSplice documentation bundle.
You may also wish to download the OpenSplice Record and Replay Manager which is a tool to control the OpenSplice Record and Replay Service and to inspect and change recorded data.

